Building a single-speed bicycle
Deep down I’ve wanted to build my own bicycle for a long while. I’ve only done very minor maintenance so far, so it’s definitely a step out of my comfort zone. I can feel this when I ask about components, but as one repair shop attendant, when I admitted not knowing all the jargon yet, told me: “the key here is yet.”
The idea •
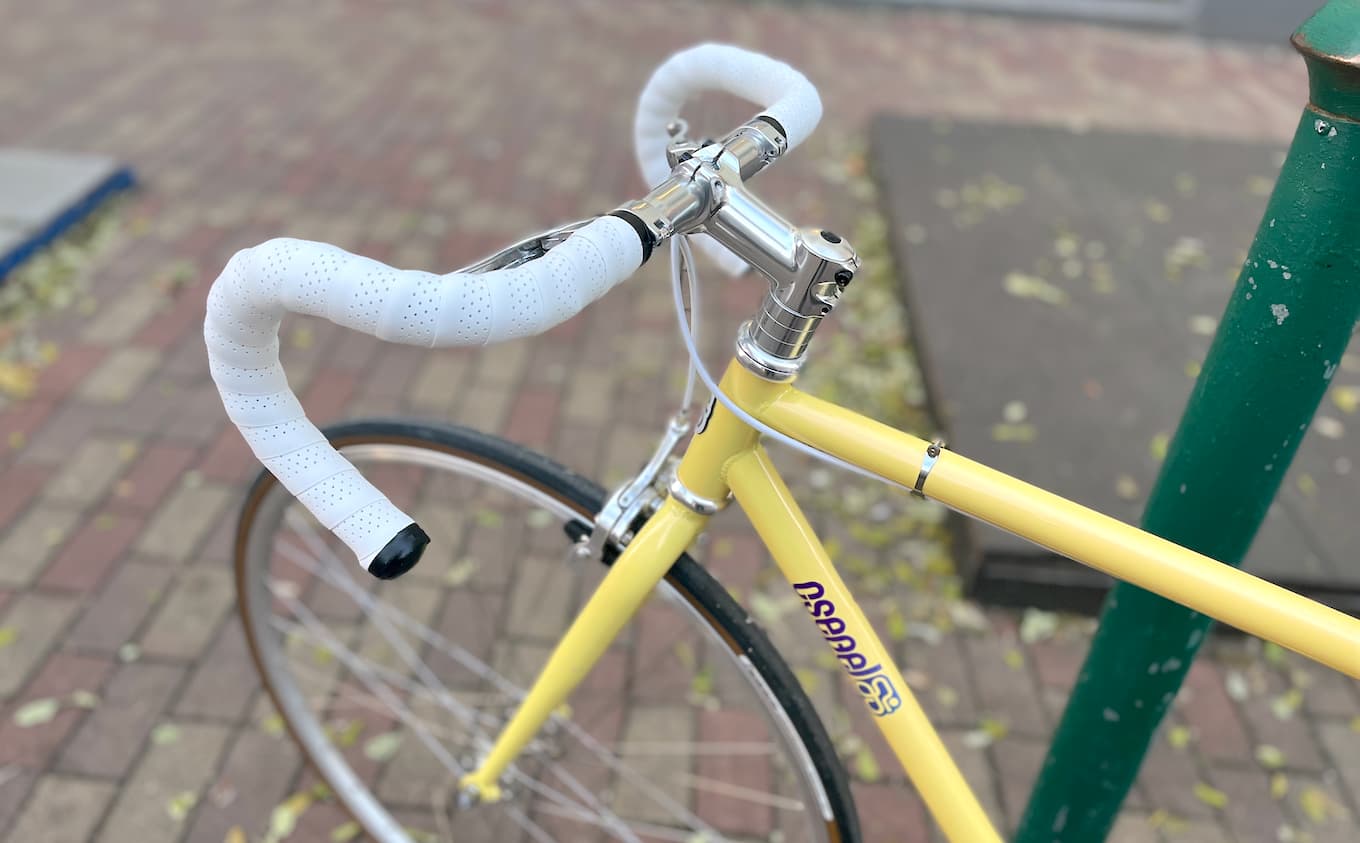
A light-weight single speed bicycle with the prettiest frame I can find, silver colour hardware[1], and drop bars.
Planning •
When I first stepped into the shop where I ordered the frame, and started to list some components, I was complimented for my preparedness. By this time I had spent hours reading about what components (and what sizes) I would need.
I used a simple spreadsheet for this, with columns description, price approx., weight, tech specs, notes. This was of great help — the world of bicycle components is a vast jungle. Some components are dependent on others, e.g. the freewheel and crankset have to yield a good combination for speed and acceleration; handlebar size has to be compatible with the stem and the brake levers[2], and so forth.
Sourcing parts •
This is most definitely the longest part of building a bicycle. Even if you get most parts from a single place, they are not likely to have everything, and there’s a lot of tiny compatibility details to pay attention to.
In my case, however, the biggest challenge was finding silver hardware parts. For some reason, everything is black these days. It was near impossible to find a silver headset (and seatpost clamp!) My rear hub is also black, but who’s looking?
I started by adding a status column to my spreadsheet, with which I would commute between two or three cycle shops (and the occasional webshop). With this many parts, it’s imperative to keep track of to do/ordered/arrived items.
Here’s a complete list of everything in my single-speed bicycle.
- frame set (including fork)
- headset
- bottom bracket
- freewheel
- crankset
- chain
- wheels (incl. rim tape)
- tyres
- inner tube
- stem
- spacers (optional)
- handlebars
- bar tape
- brake levers
- rim brake calipers
- brake cables
- cable housing; cable ends
- cable guides
- saddle
- seat post
- seat post clamp
- pedals
Putting it together •
The most difficult parts of assembling a single-speed bicycle are building the wheels, and mounting the headset. I had the wheels built in a local bicycle shop (they were kind enough to even mount the freewheel).
Mounting the headset would not be too complicated in itself, but it requires a special tool that is more on the expensive side. My workshop[3] also lacks a proper saw to cut off the top of the fork to the required length. The shop where I got the frame and fork kindly offered to do these for me.
With these challenges out of the way, I was almost set to start — still missing a bottom bracket tool, which I quickly got from Decathlon.
Here’s a list of all the tools and bits I used to complete this build.
- allen keys (4, 5, 6mm)
- cone wrenches (adjustable / various sizes)
- bottom bracket tool
- chain tool
- wire cutter (the stronger the better)
- tyre levers
- pump
- lithium grease
- a piece of non-pile cloth to clean tools / parts / hands
Build log step by step
I started with putting the tyres and tubes on the wheels. Add some air, too.
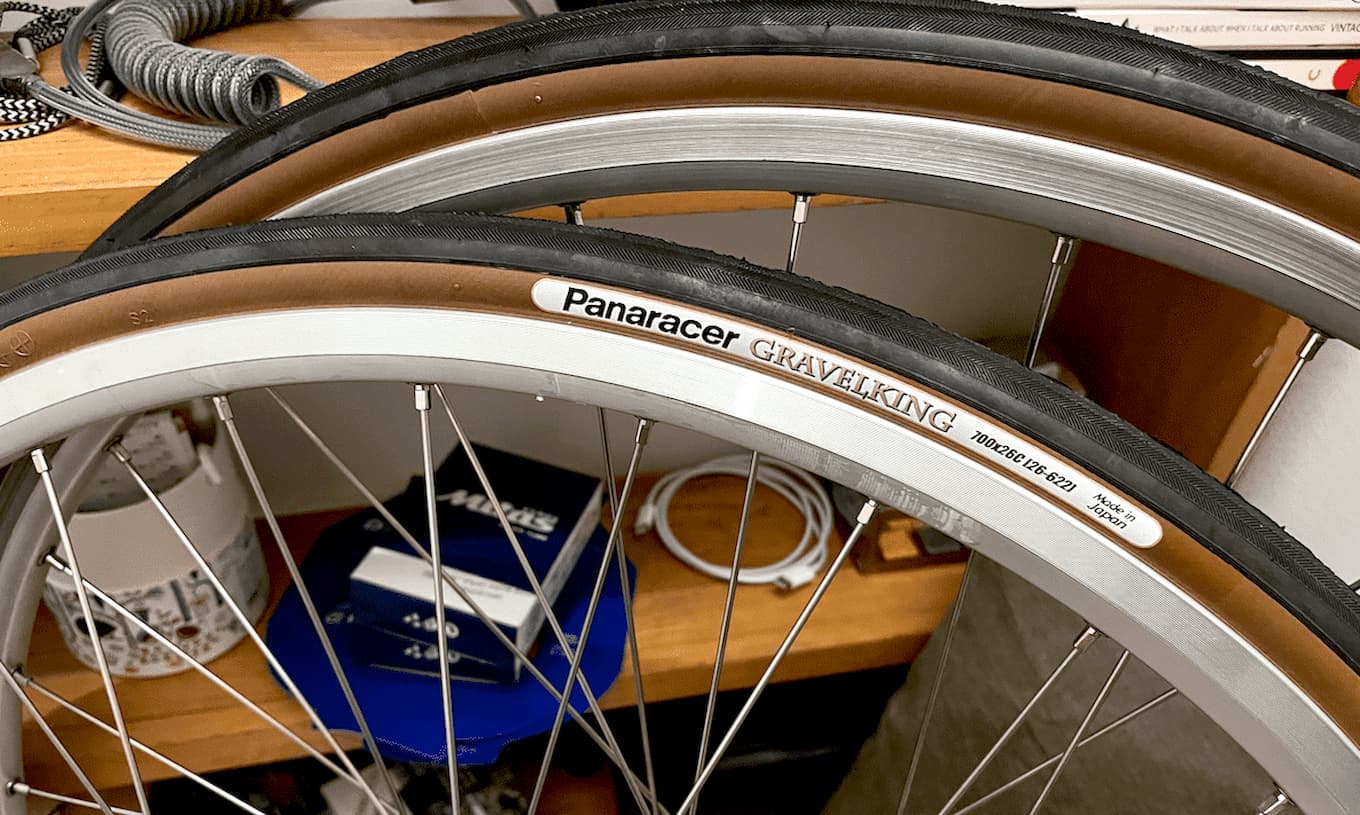
Wheels are ready to go.
With the fork, stem and freewheel already attached to the frame, the next step was to install the bottom bracket. The bottom bracket goes into the tubular hole at the middle/bottom of the frame, and allows the crankset[4] to rotate[5].
Two things are essential when installing the bottom bracket: knowing the thread direction[6], and greasing. You’ll need a bottom bracket tool and a cone wrench.
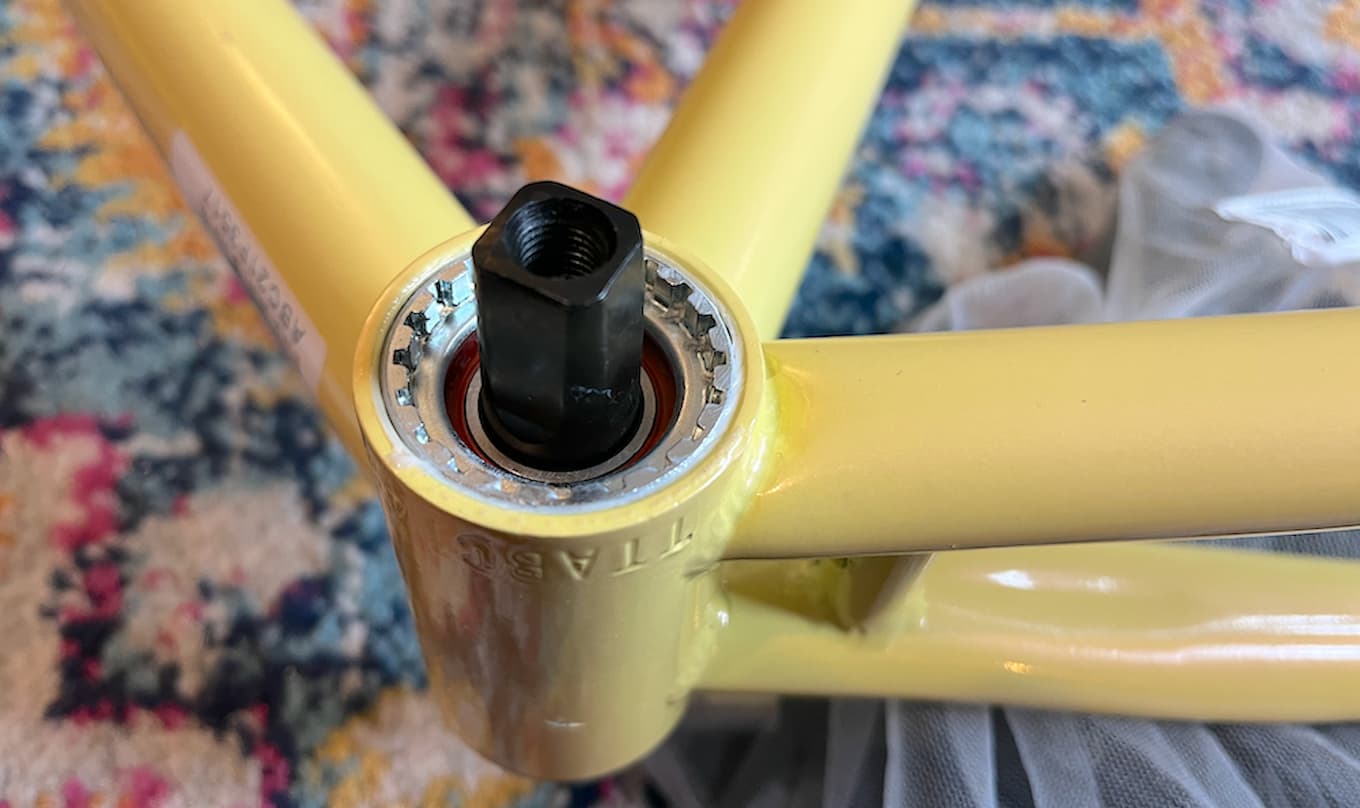
Frame with bottom bracket inserted
Next, I attached the crankset to the bottom bracket using an allen key. Screws greased of course.
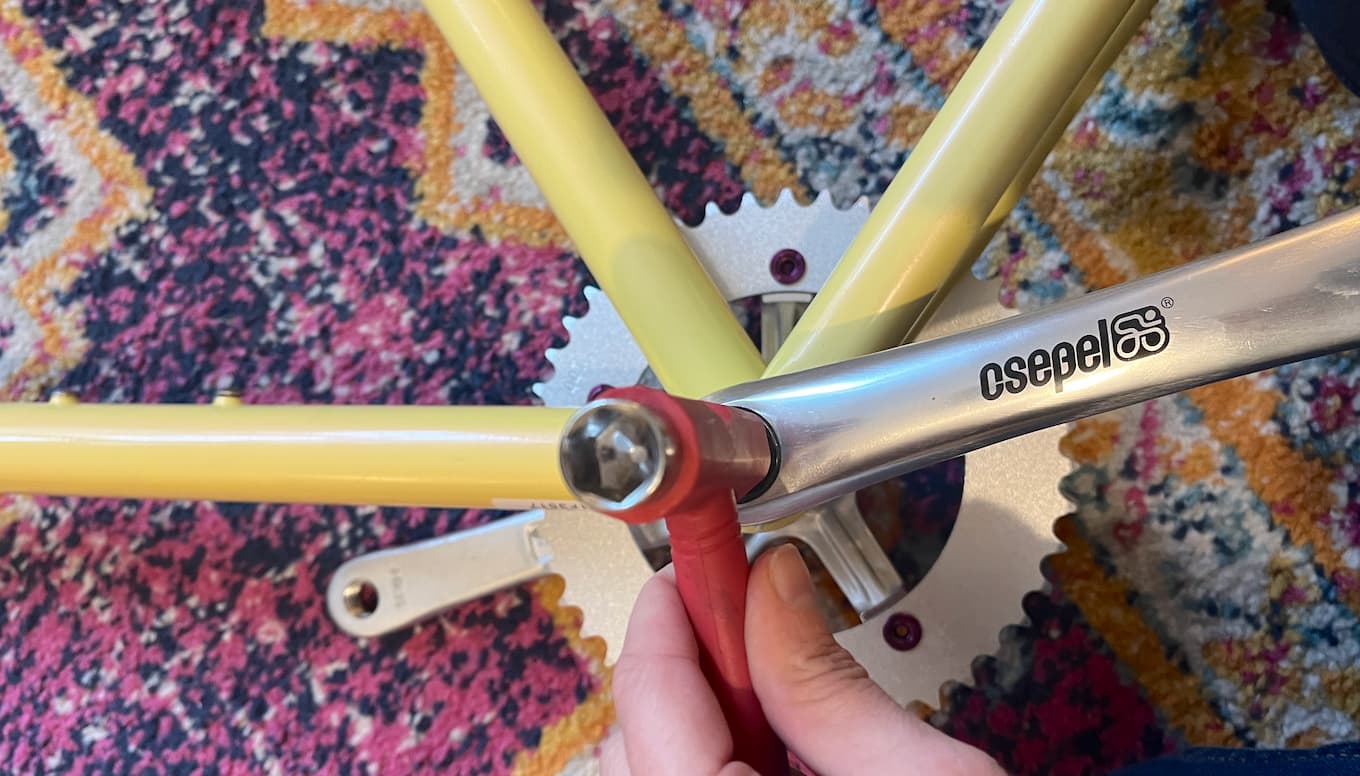
Tightening the crankset
Time for the wheels and chain to go into their place. My chain came sealed pre-greased, so it was quite messy to work with. Also, chain installation was the most fiddly thing in the whole build. The chain has to be the right length, you sometimes need three hands to do it (three small hands are ideal), plus there’s the problem of stiff chain links[7] and chain too tight/too loose[8].
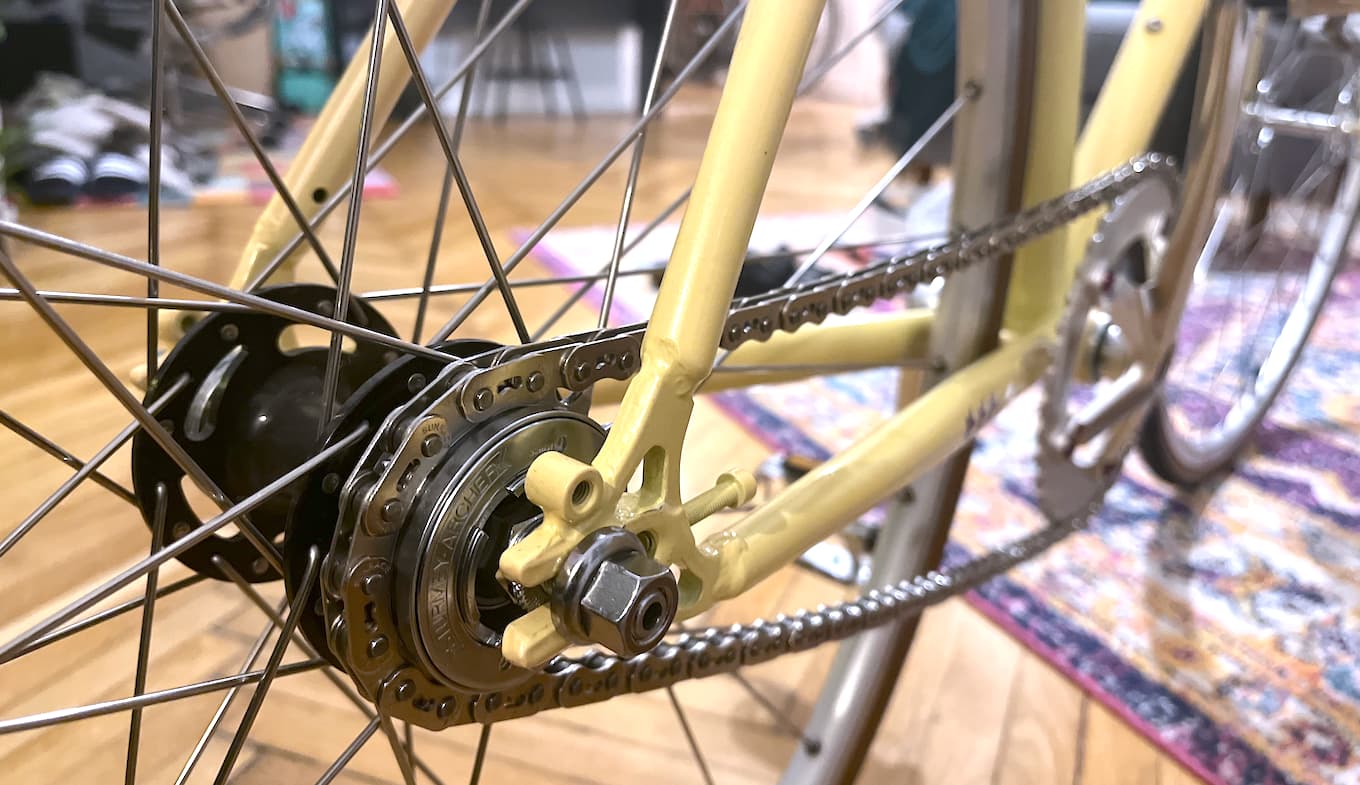
No chain — no gain.
Handlebars! Loosen the handlebar end of the stem, insert the handlebar, tighten.
At this point, we can ride but we can’t stop. Time to fix that. Screws well-greased, I mounted the brake levers on the handlebars and the brake calipers on the frame.

Nothing can stop me now — this is a problem. This bicycle needs some cables.
Connecting the dots, next was brake wiring. I cut the brake cable and housing to the correct length, added the tiny metal covers to each end (I suppose this is optional, for added protection — they don’t seem to do much). I first lead the cables through the brake levers, then through the housing, all the way to the calipers, then secured them and added a tiny metal cap for it to prevent from slipping (or scratching things?) I also fixed the back brake cable to the underside of the top tube, using two cable guides.
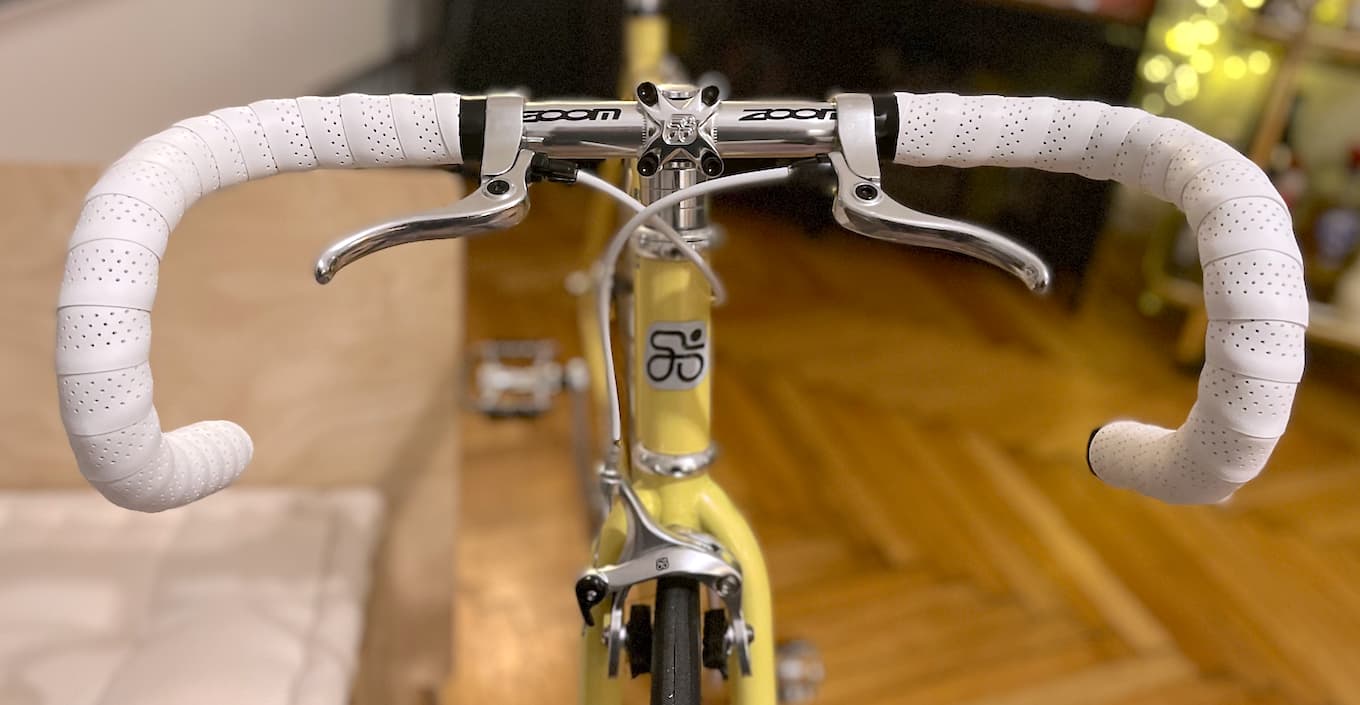
Cabled and bar-taped.
Finishing touches, in no particular order: adding the bar tape, saddle and seat post (the seat post well-greased, of course) secured with a seat post clamp, and pedals.
Some final thoughts •
The build complete, I adjusted the brakes and tyre pressure, and went for a test ride. Success: nothing came loose; the bike feels very smooth and lightweight, and is capable of taking me from A to B.

Ready to ride!
- The total cost of the build was roughly 630€, all new parts. This includes the purchase of some specific but inexpensive tools.
- If you decide to try this at home, do check size compatibility of every single component. Your local bike shop will help.
- This was immensely much fun, and not too complicated. 10/10 would do again.
This turned out to be a major difficulty, but more on this later. ↩︎
Which in turn have to be compatible with the type of brake cable. ↩︎
Just some tools on a shelf really. ↩︎
or chainset, depending on where you live ↩︎
and by doing so, drive the chain, turn the wheels, advance the bicycle. ↩︎
Usually, but not always, this is ‘backwards’/left on the right side, and normal direction on the left side. ↩︎
fixed by repeatedly moving the chain the way it’s supposed to, and forcing it the way it’s not supposed to — for example, by inserting something in between the outer chain links and forcing them a tiny tiny bit apart. ↩︎
Good news if your frame has a horizontal dropout: you can adjust the chain’s tightness by moving the rear wheel forward or back. ↩︎